Choosing columns
Click the Columns button in the toolbar to open the column selector.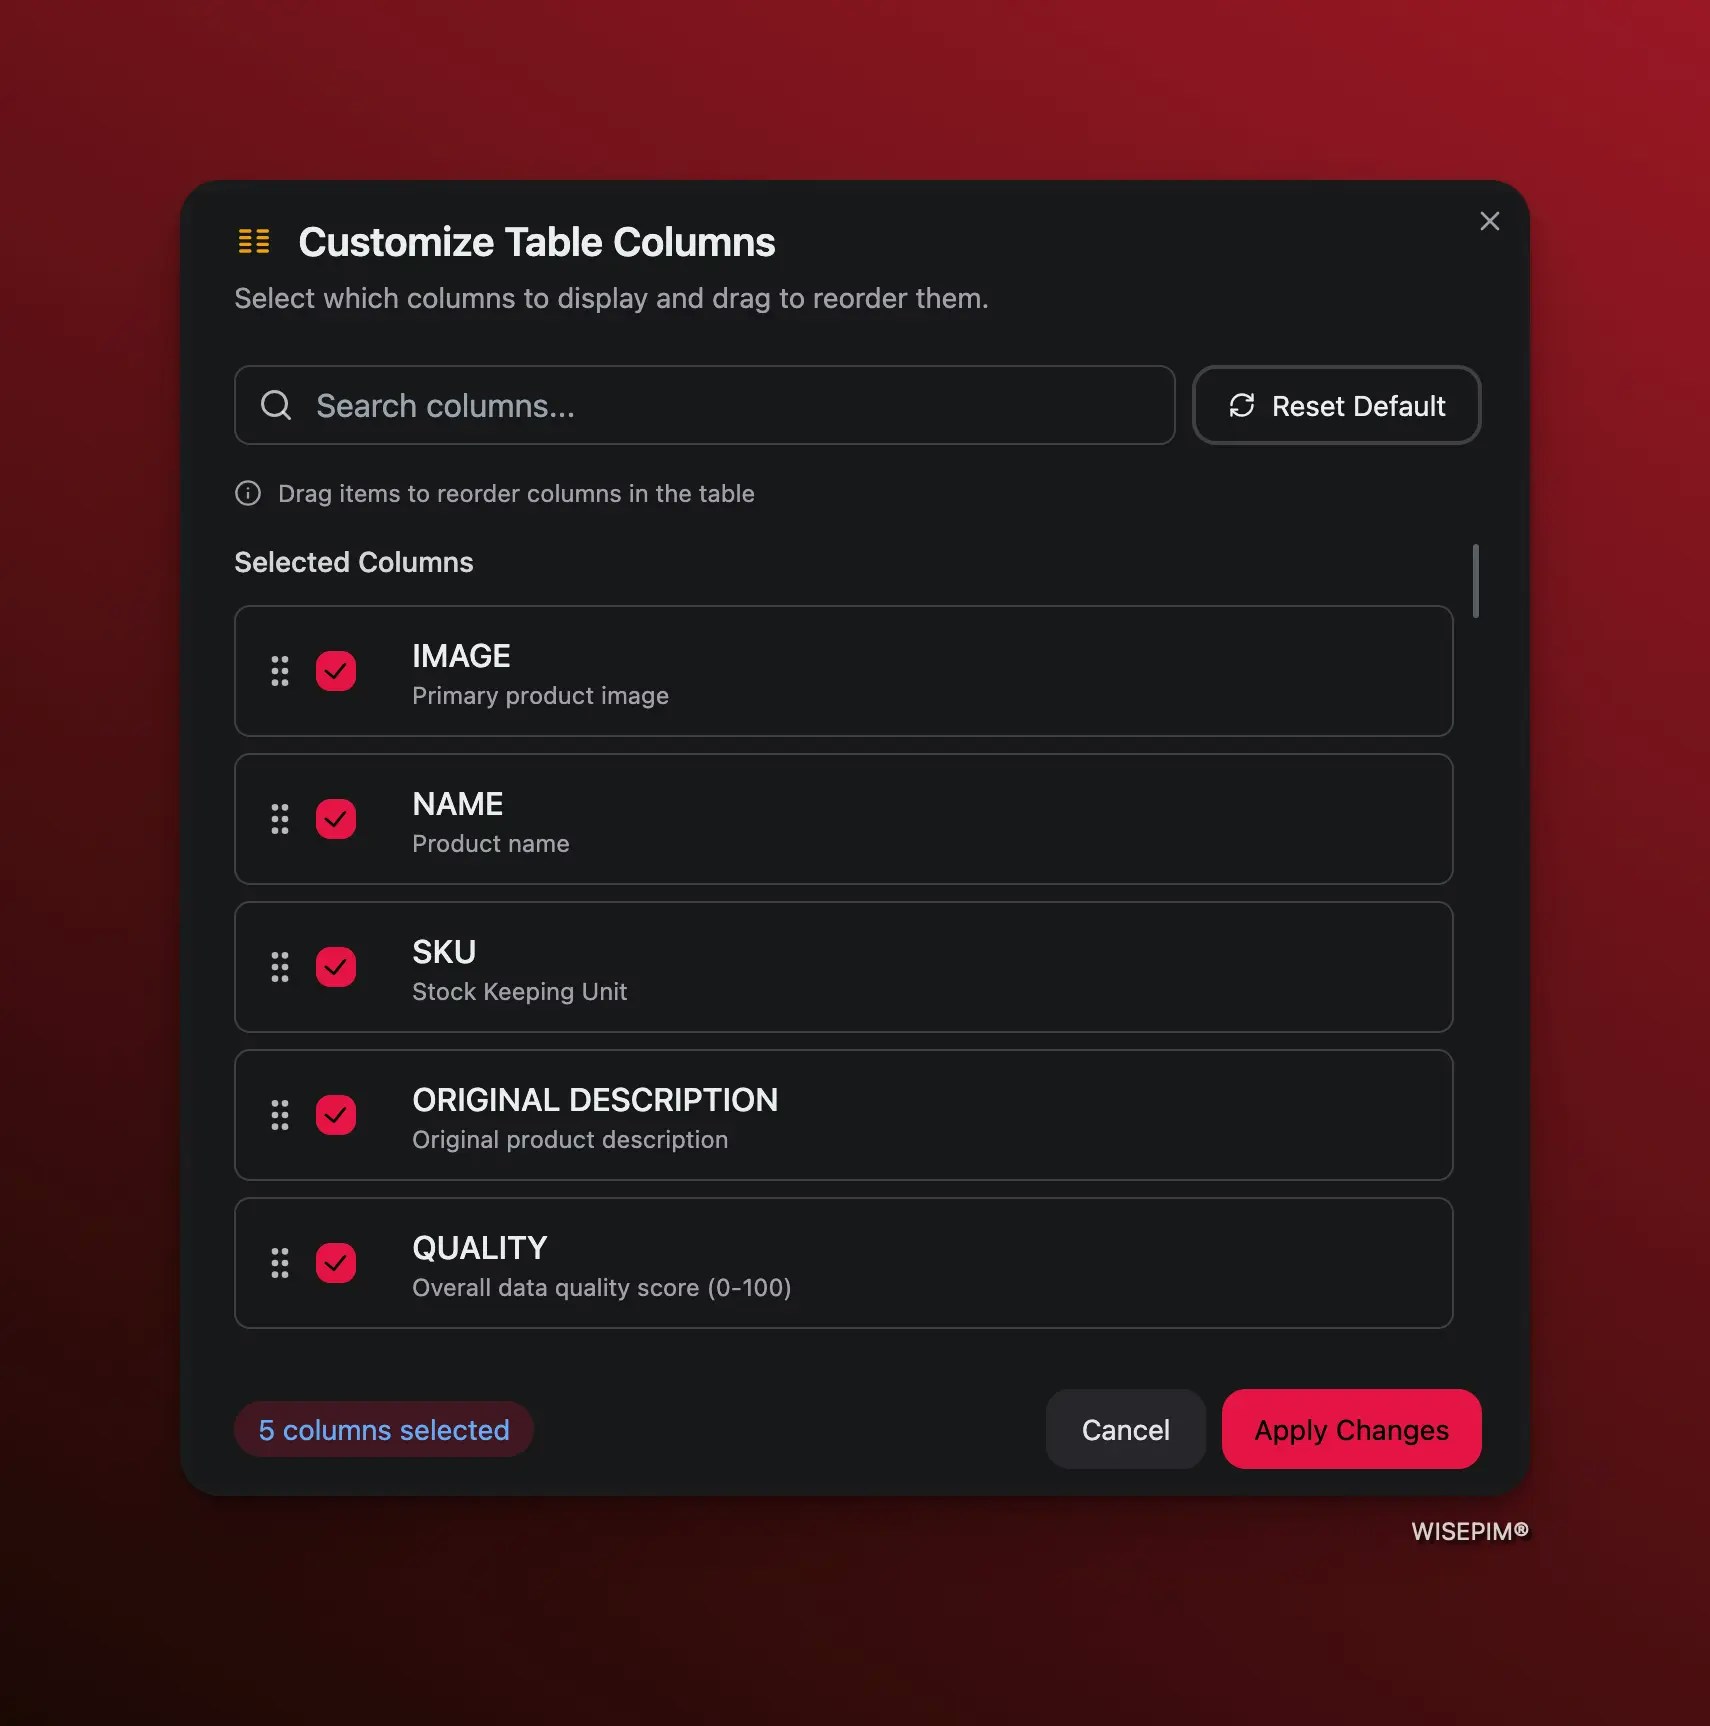
Add or remove columns
Check columns to show them, uncheck to hide them. Use the search box to find specific columns quickly.
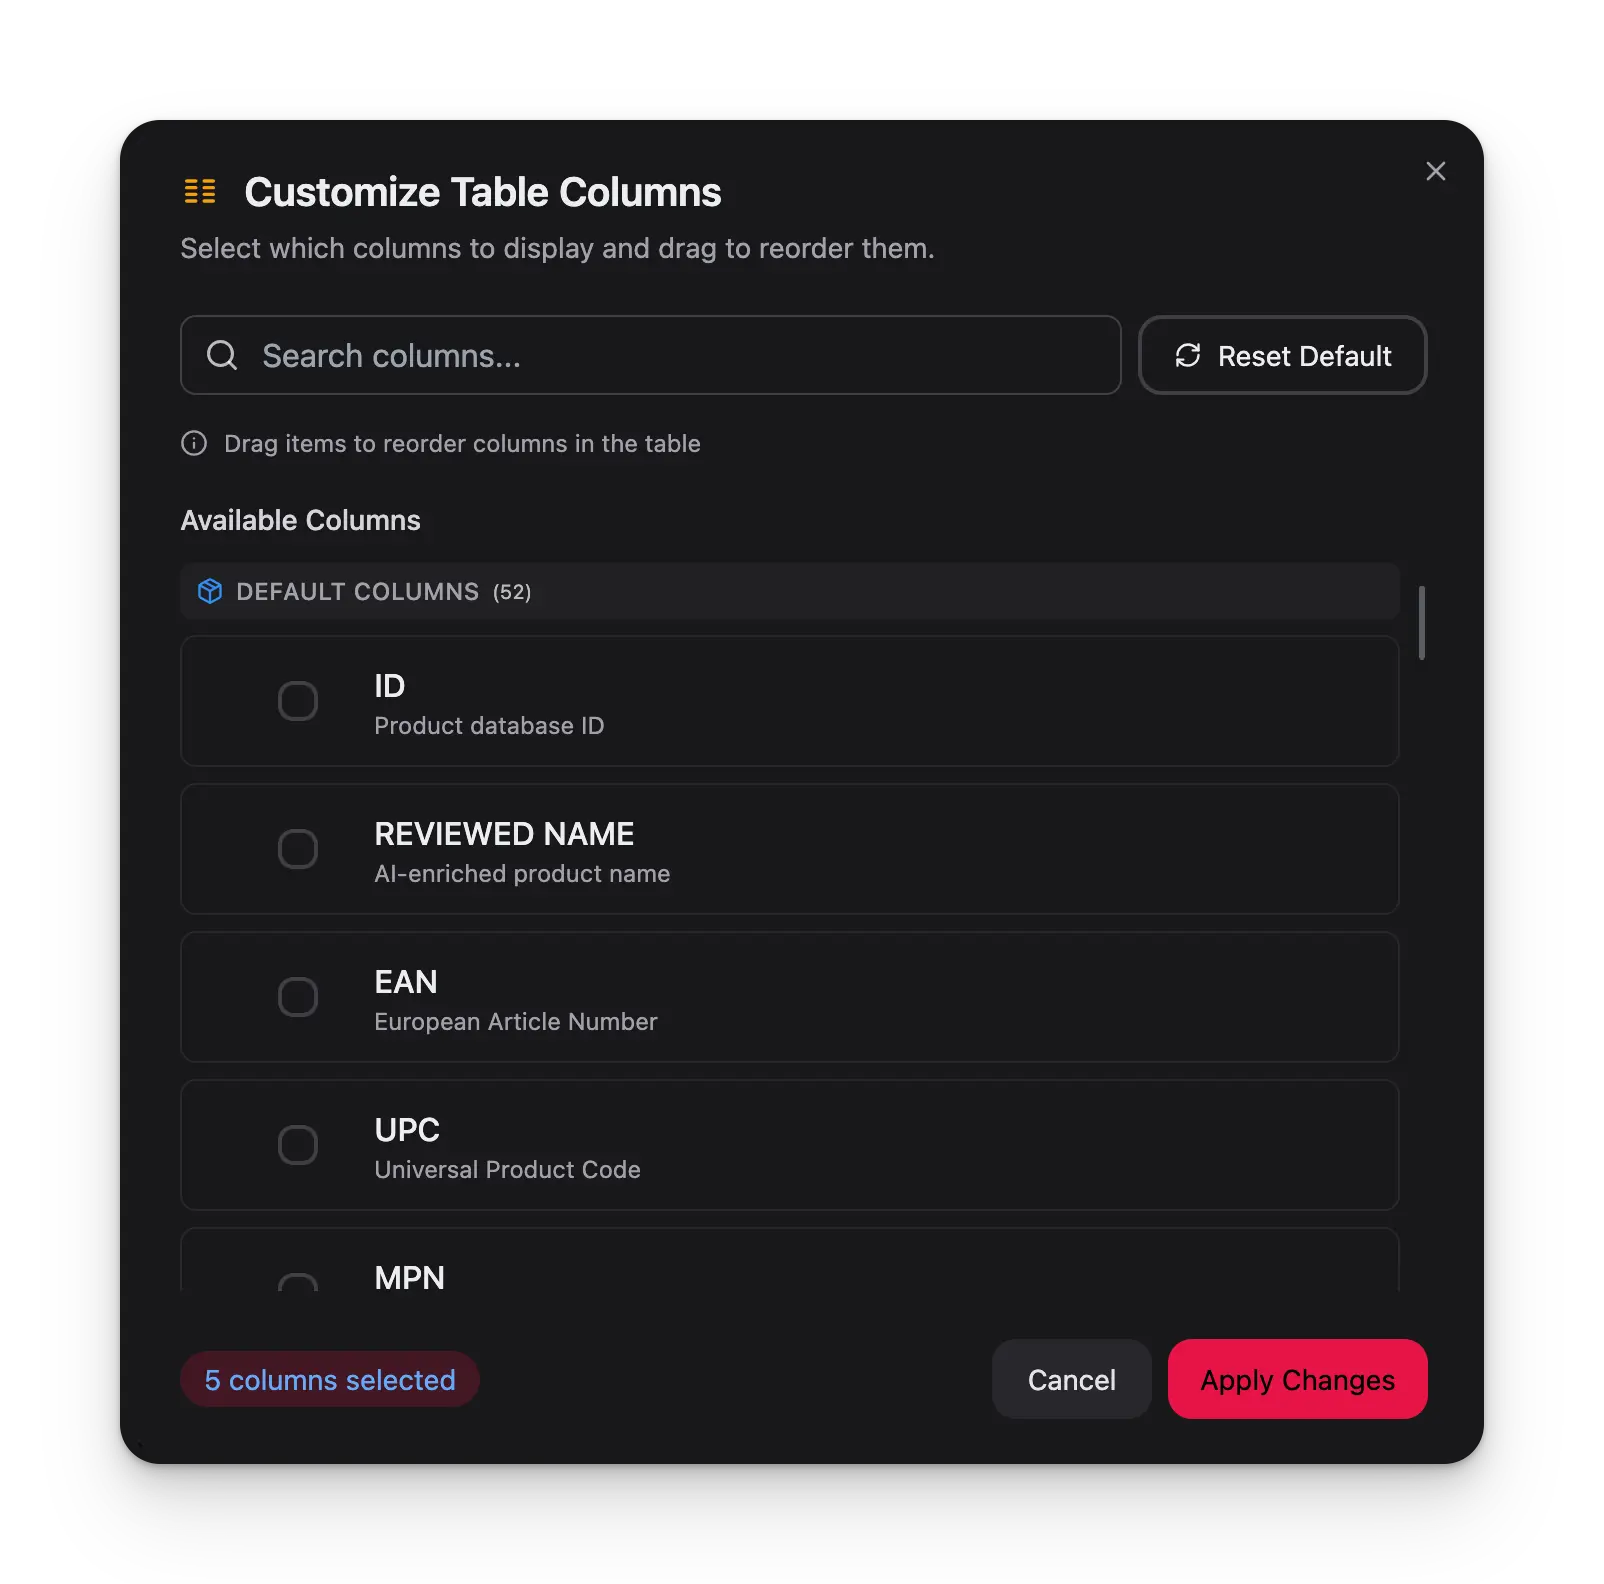
- Default columns — Standard product fields (Name, SKU, Price, Status, etc.)
- Custom attributes — Fields from your attribute groups and product families
The Actions column is always visible and locked to the right side of the table. It cannot be hidden or moved.
Row height
Adjust how much vertical space each product row takes up using the row height selector in the bottom-right pagination area.| Height | Best for |
|---|---|
| Compact | Scanning large lists quickly |
| Normal | Everyday use (default) |
| Comfortable | Reviewing product details |
| Spacious | Working with product images |
Saving layout templates
Once you’ve set up a view you like, save it as a layout template so you can switch back to it anytime.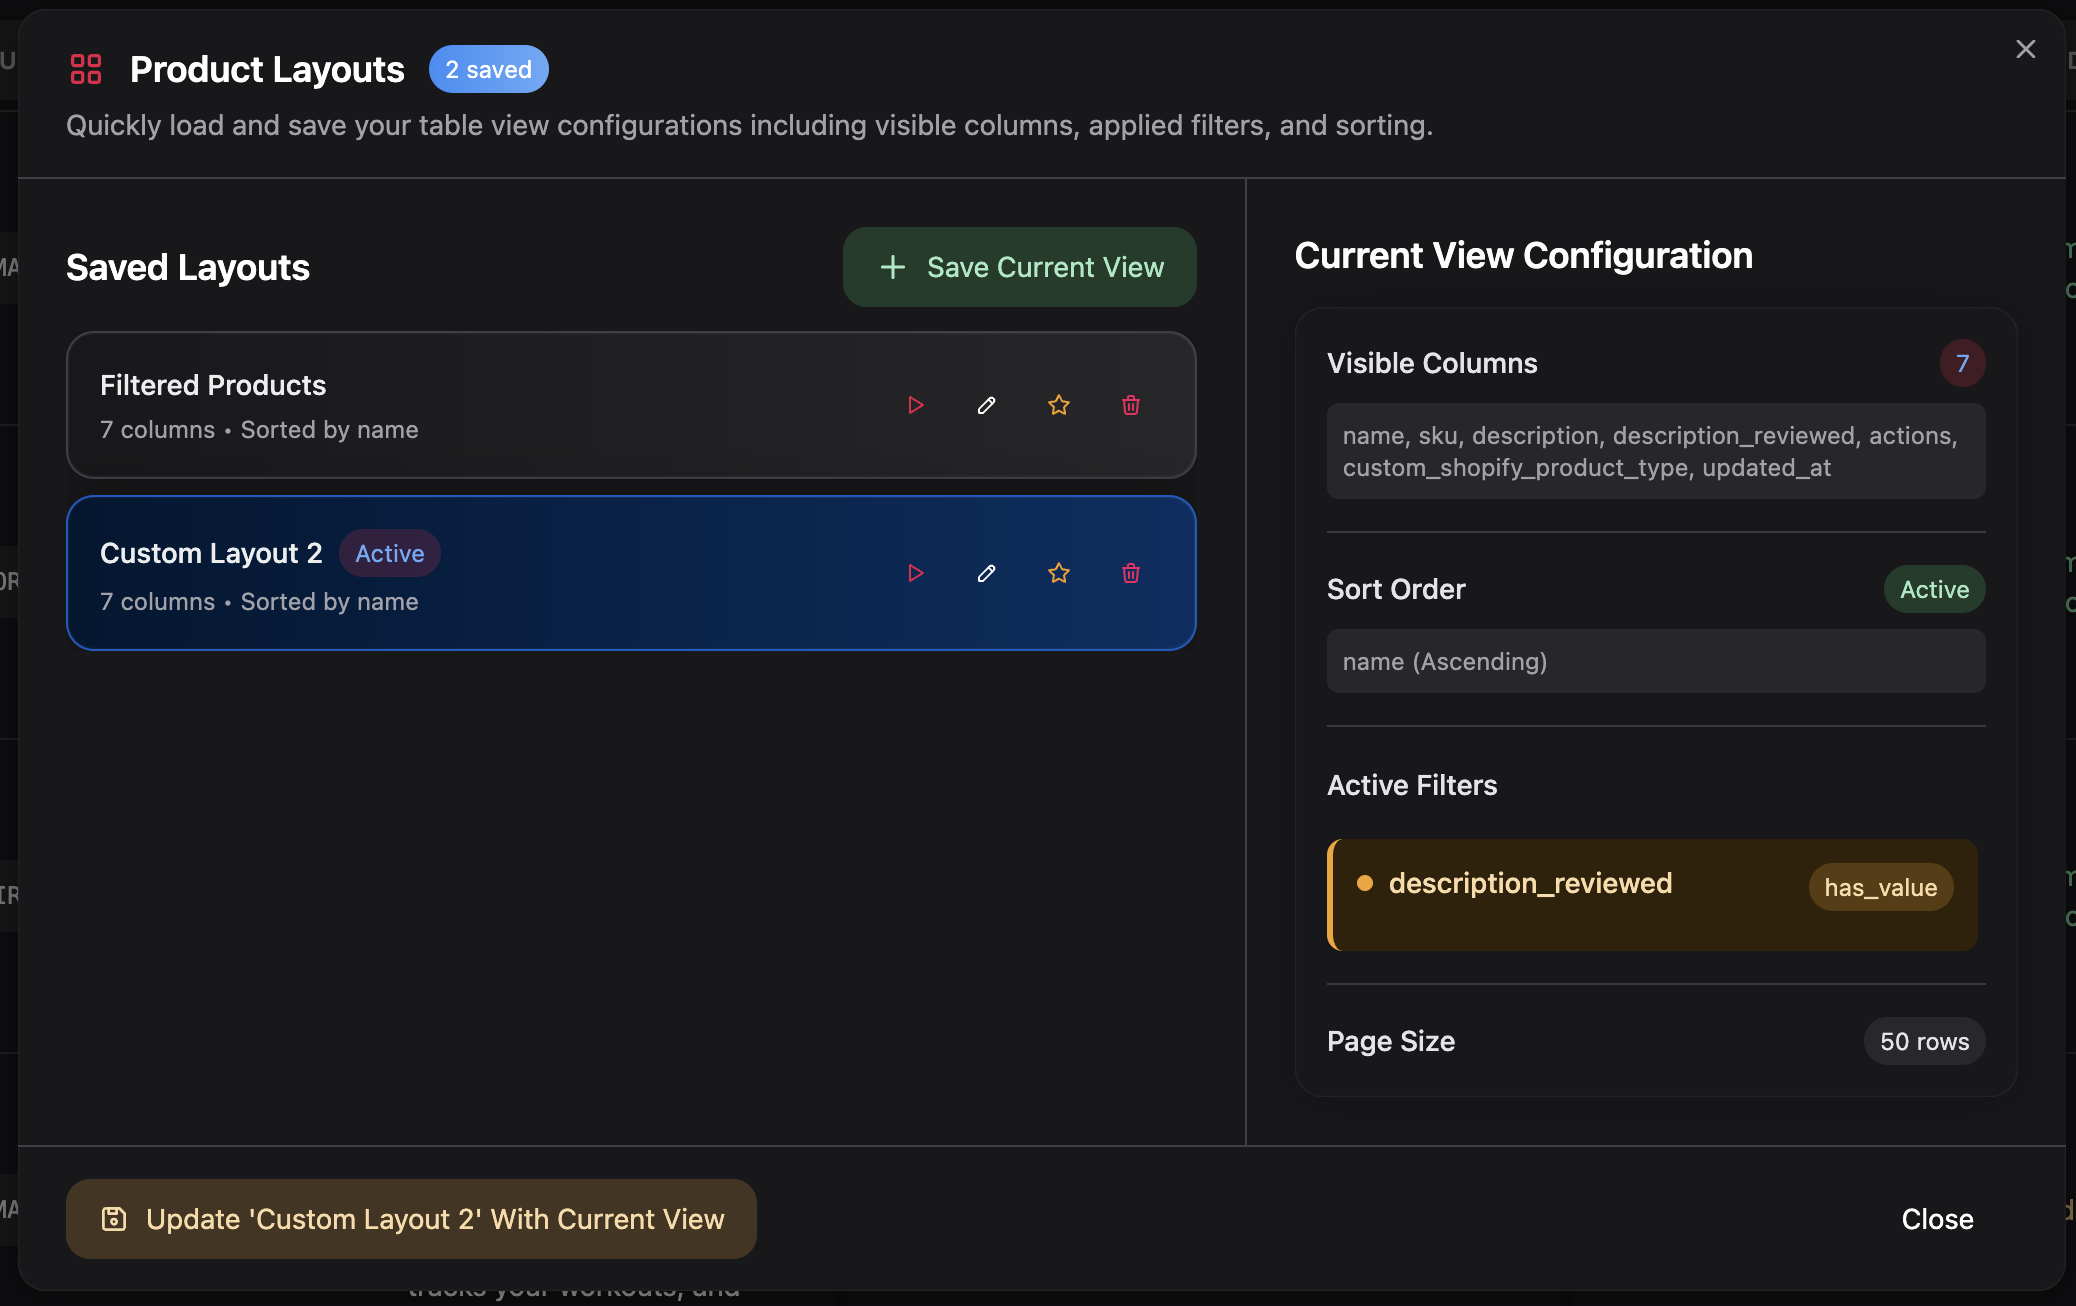
What gets saved
A layout template captures your entire view configuration:- Visible columns and their order
- Sort settings (which column, direction)
- Active filters (search query, advanced filters)
- Page size (rows per page)
Creating a layout
Switching between layouts
Click the Layouts button and select a saved layout to apply it. The active layout name appears as a blue badge on the Layouts button.Managing layouts
From the Layouts modal you can:- Apply a saved layout
- Update the active layout with your current view changes
- Rename a layout
- Set as default to auto-load it when you open the Products page
- Delete a layout you no longer need
When your current view differs from the active layout, an Update button appears so you can save the changes without creating a new layout.
Tips
- Create task-specific layouts — Set up different layouts for different jobs: “Daily Review” with status and description columns, “Price Update” with price and margin columns, “Export Prep” with all fields your webshop needs.
- Use a default layout — Set your most-used layout as the default so the Products page always opens ready for your primary workflow.
- Reset when needed — Use the Reset to Default button in the column selector to start fresh if your view gets cluttered.