> ## Documentation Index
> Fetch the complete documentation index at: https://docs.wisepim.com/llms.txt
> Use this file to discover all available pages before exploring further.
# Assign to Categories
> Bulk add products to one or more categories without removing existing ones. Parent categories are selected for you, and conflicts get flagged.
Add products to one or more categories in a single pass. By default this adds to their current categories instead of replacing them, so nothing you already set up gets lost.
Use this to organize new products or build out a category as your catalog grows.
## Assign products to categories
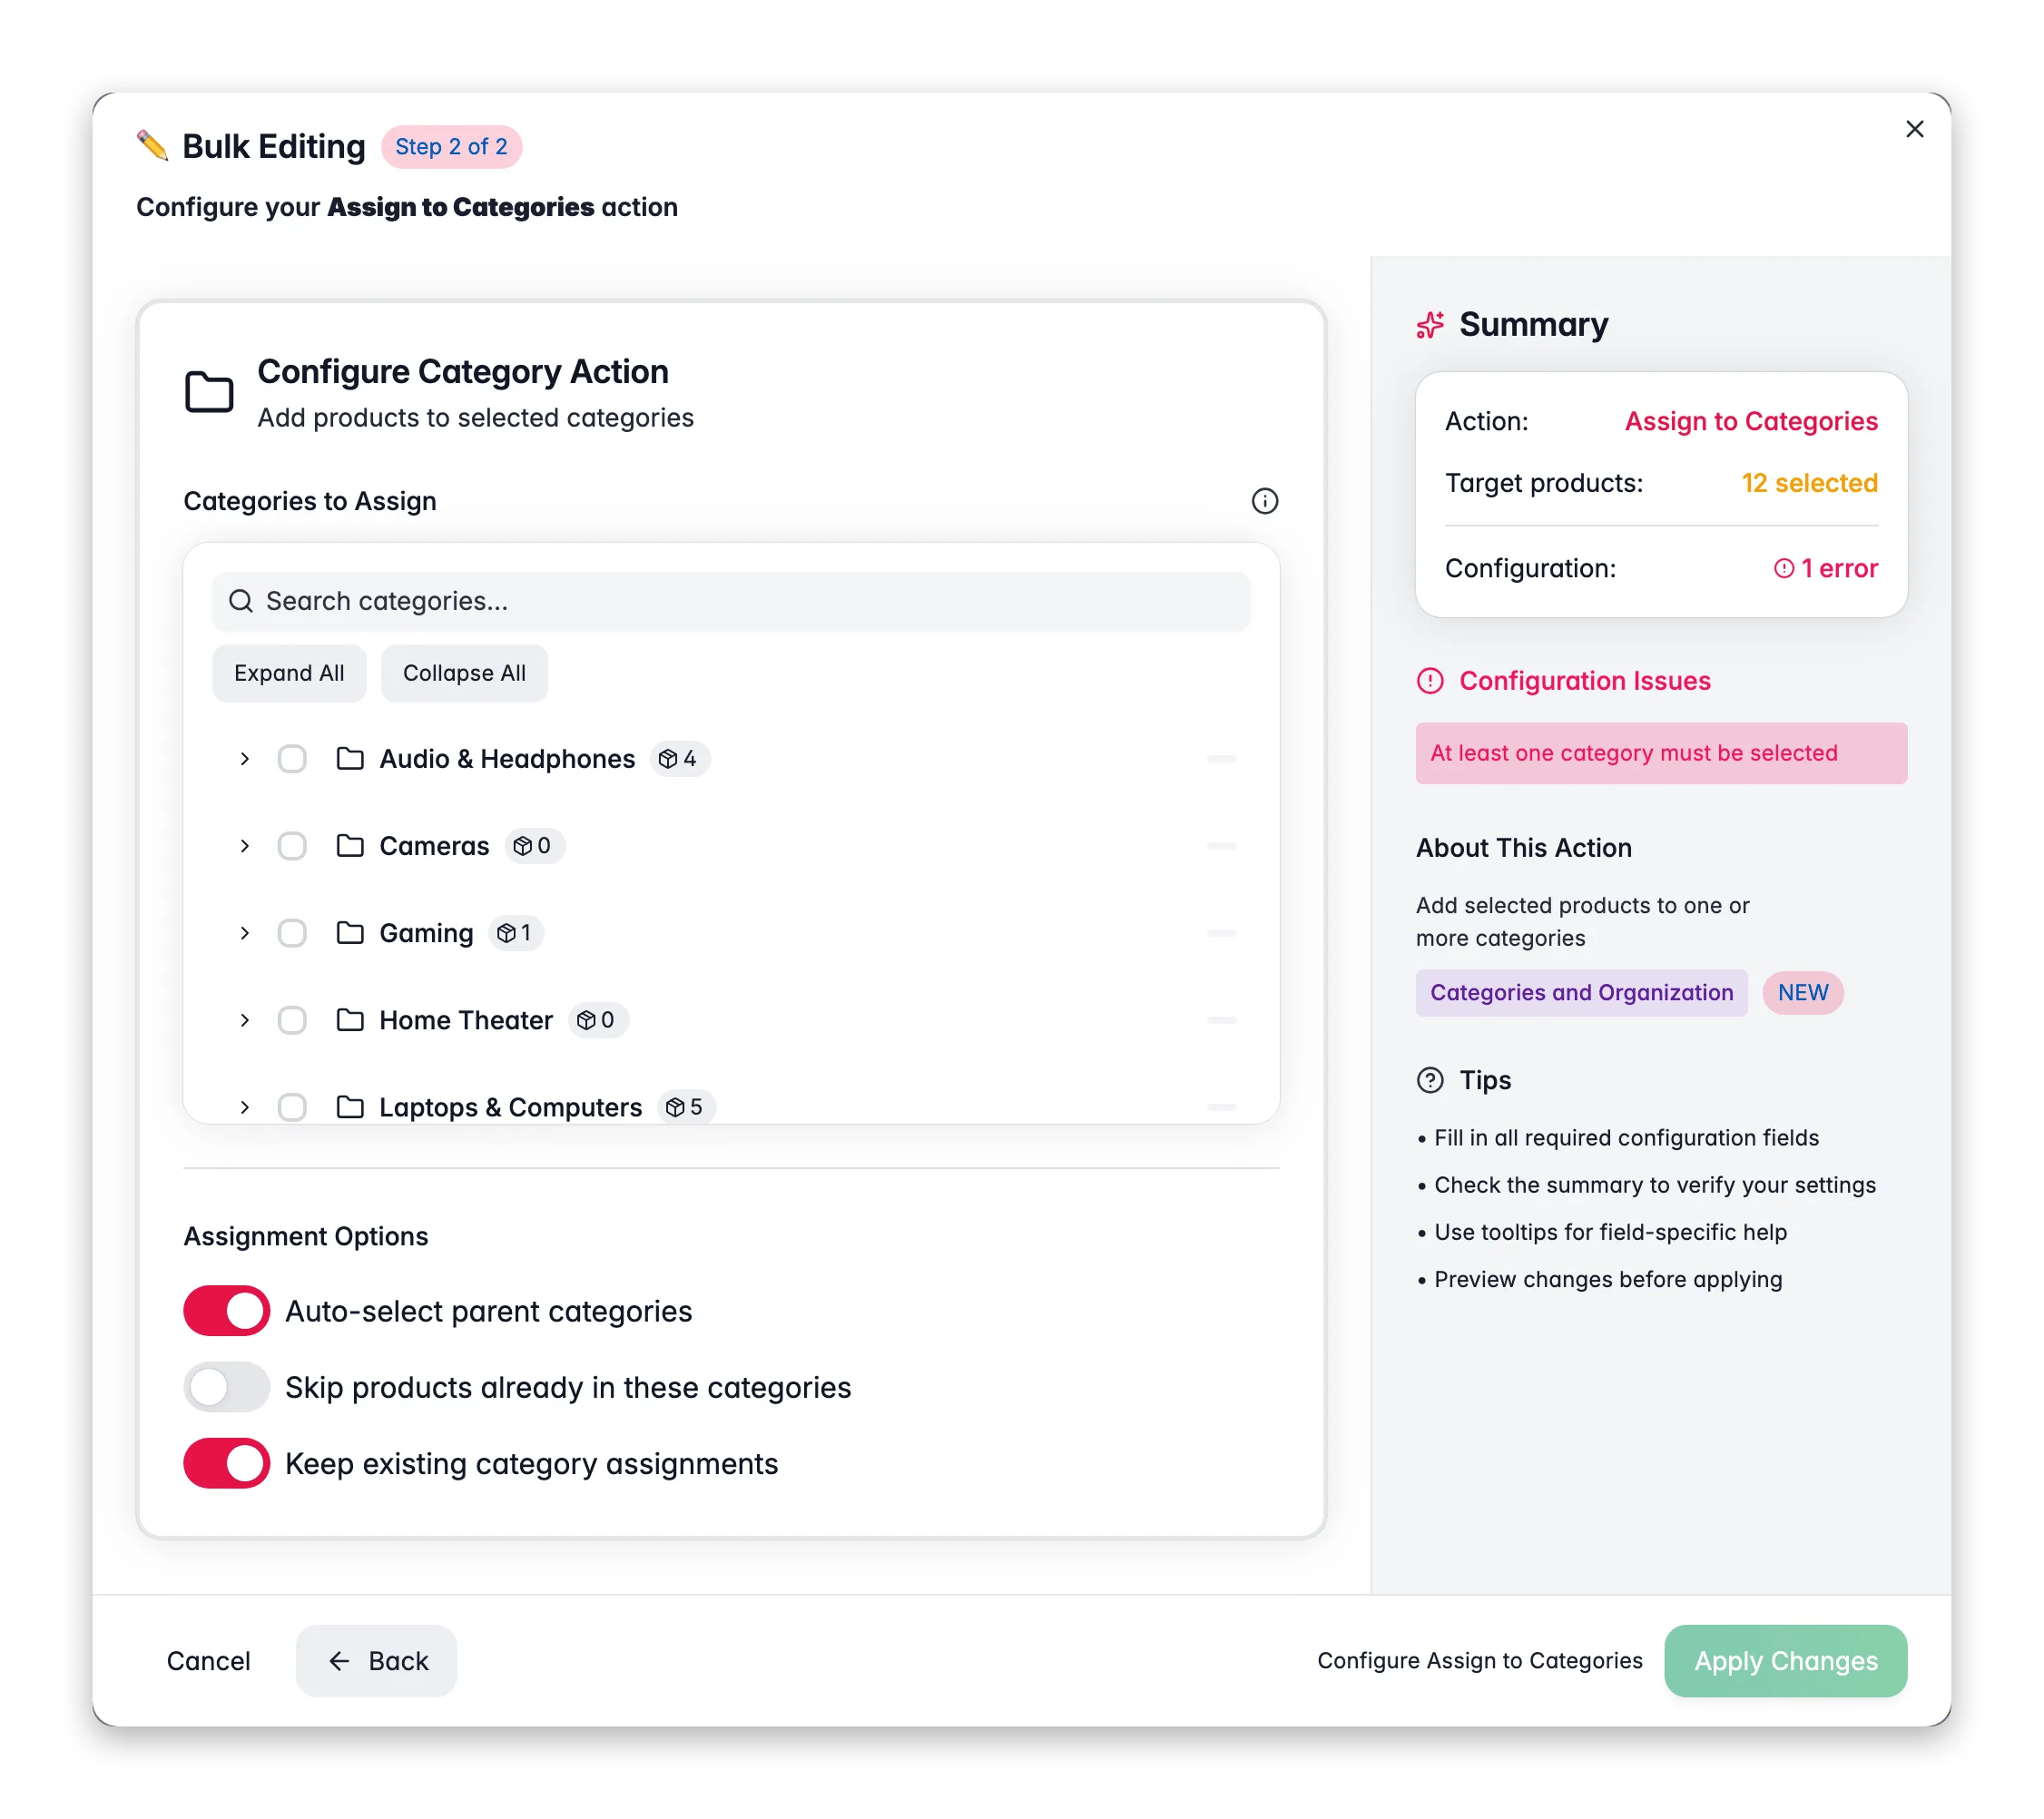
 Check the products you want to categorize. Or use filters and select all matching results.
Click **Bulk Edit**. Search for "Assign to Categories" or find it under **Categories & Organization**.
Use the category tree to select one or more categories. Parent categories are selected for you by default.
Change the options below if you need to, then click **Apply**.
## Options
| Option | What it does | Default |
| --------------------------------------------- | ------------------------------------------------------------------- | ------- |
| **Categories** | The categories to assign, picked from the category tree | None |
| **Auto-select parent categories** | Includes every parent category when you pick a child | On |
| **Skip products already in these categories** | Leaves products that already have the selected categories untouched | Off |
| **Keep existing category assignments** | Adds to current categories instead of replacing them | On |
## Tips
* Keep **Auto-select parent categories** on so products stay properly nested in the tree. Most e-commerce platforms need this.
* WisePIM flags parent-child conflicts, so you know when a selection creates unexpected nesting.
* Filter your product list first. For example, filter by brand, then assign all matching products to a brand category in one go.
## Related
Take products out of specific categories in bulk.
Clear current categories and set new ones in one step.
Choose which category is the main one for each product.
Browse every bulk action available in WisePIM.
Check the products you want to categorize. Or use filters and select all matching results.
Click **Bulk Edit**. Search for "Assign to Categories" or find it under **Categories & Organization**.
Use the category tree to select one or more categories. Parent categories are selected for you by default.
Change the options below if you need to, then click **Apply**.
## Options
| Option | What it does | Default |
| --------------------------------------------- | ------------------------------------------------------------------- | ------- |
| **Categories** | The categories to assign, picked from the category tree | None |
| **Auto-select parent categories** | Includes every parent category when you pick a child | On |
| **Skip products already in these categories** | Leaves products that already have the selected categories untouched | Off |
| **Keep existing category assignments** | Adds to current categories instead of replacing them | On |
## Tips
* Keep **Auto-select parent categories** on so products stay properly nested in the tree. Most e-commerce platforms need this.
* WisePIM flags parent-child conflicts, so you know when a selection creates unexpected nesting.
* Filter your product list first. For example, filter by brand, then assign all matching products to a brand category in one go.
## Related
Take products out of specific categories in bulk.
Clear current categories and set new ones in one step.
Choose which category is the main one for each product.
Browse every bulk action available in WisePIM.